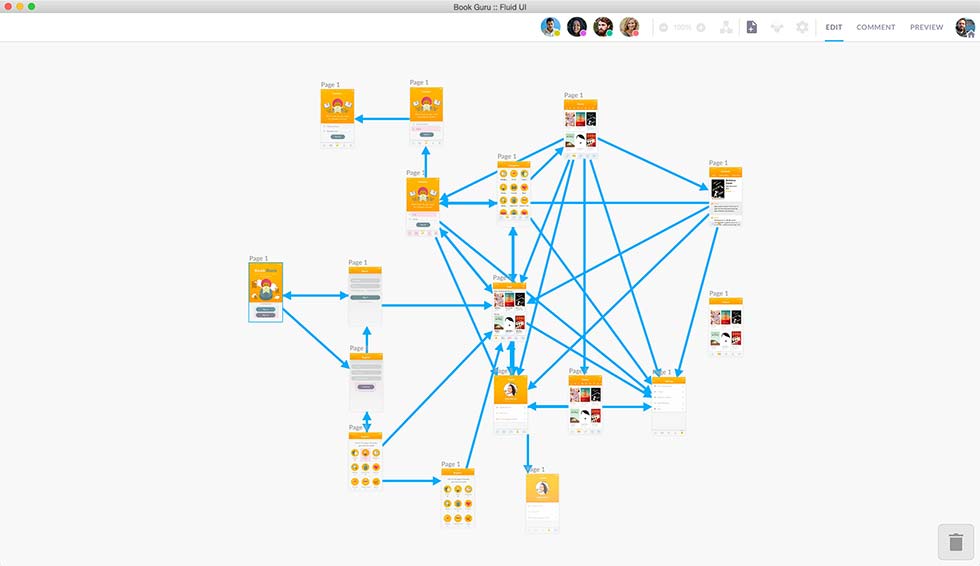
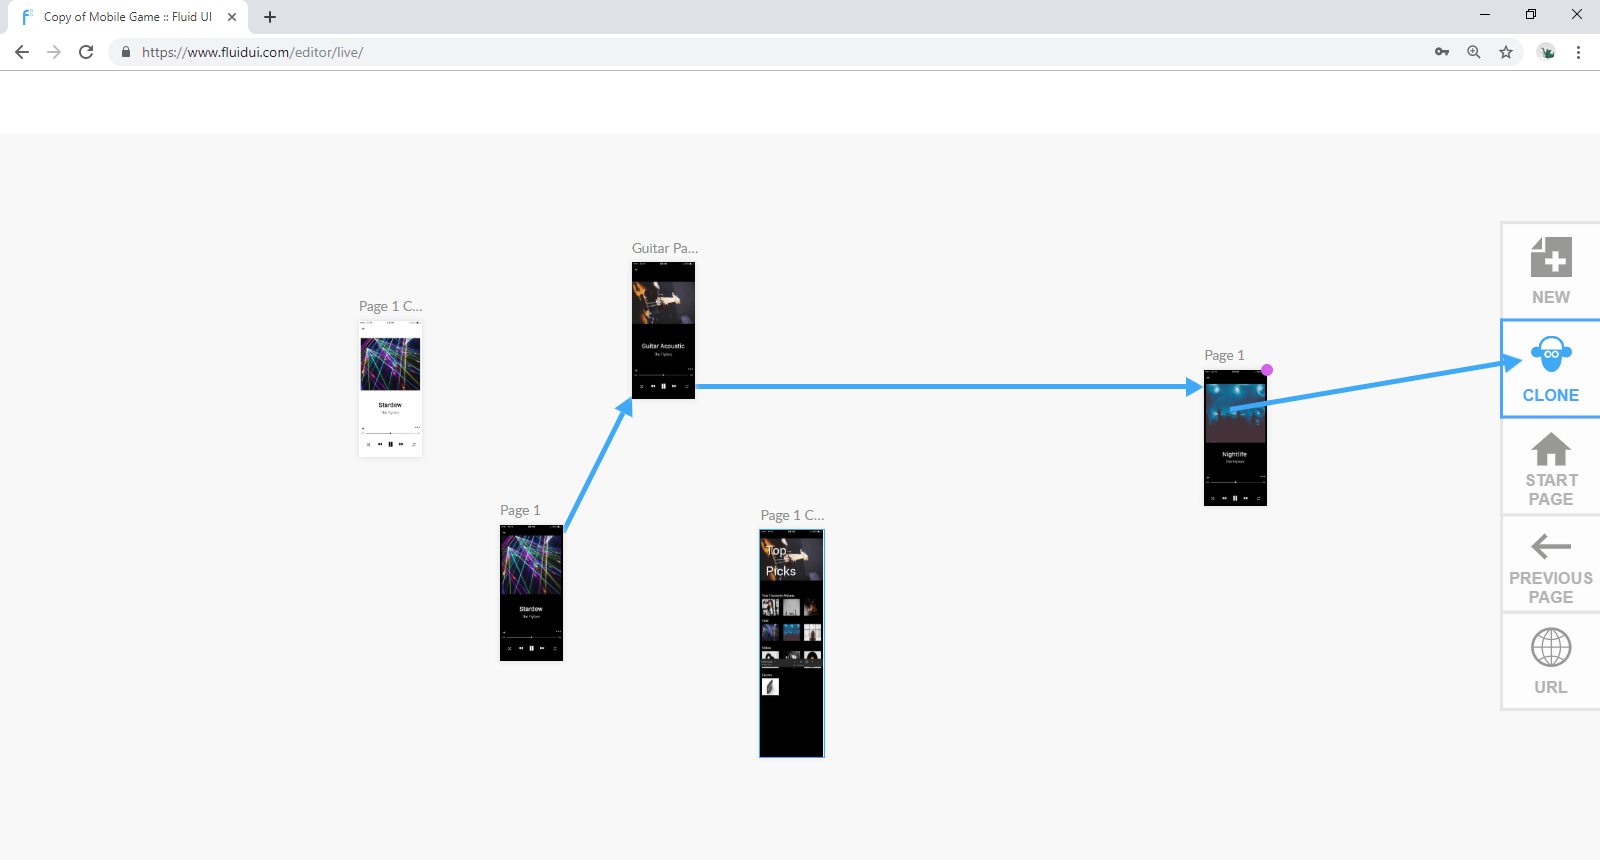
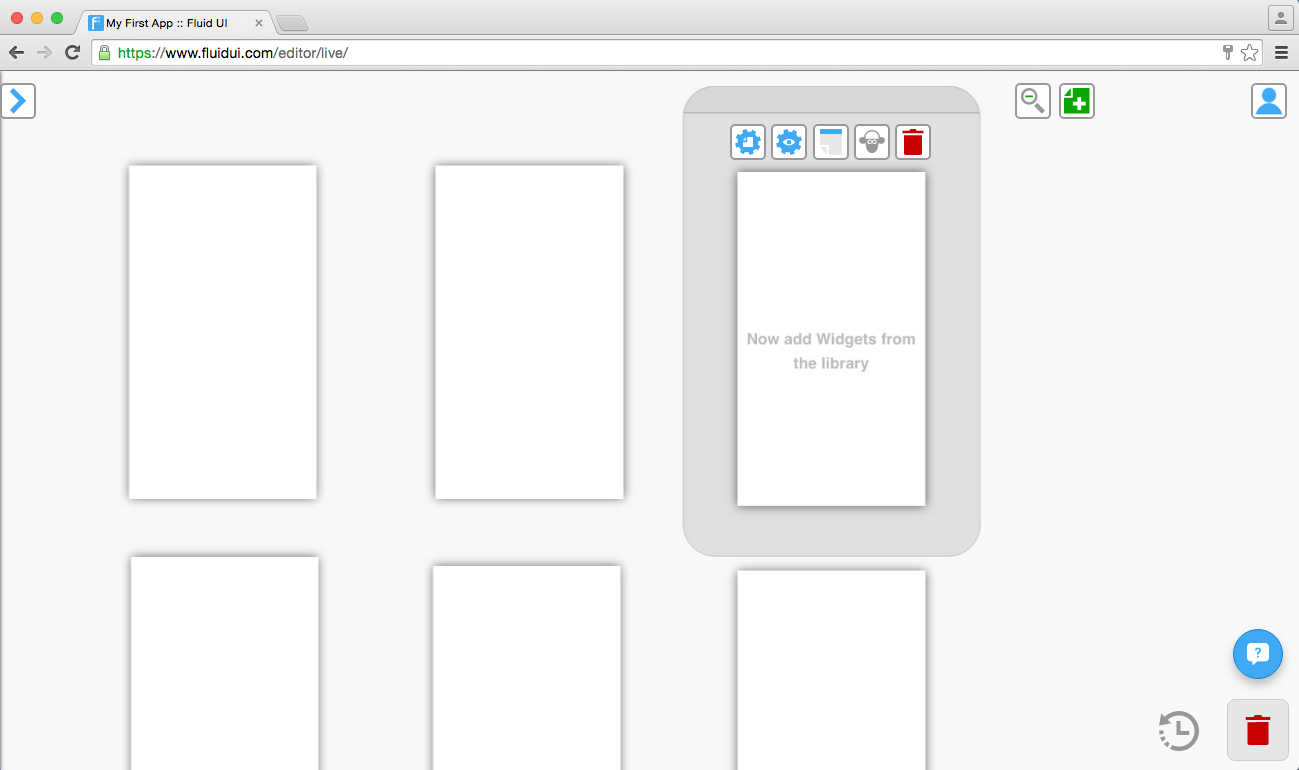
There are 3 ways to create a page with Fluid UI:
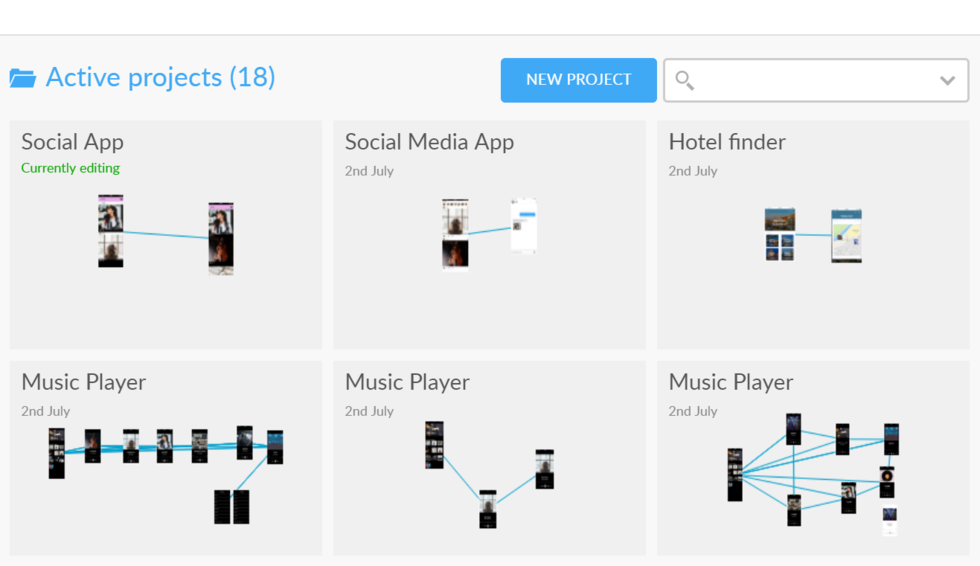
Once created, pages can be moved around the canvas to create a storyboard for your prototype.
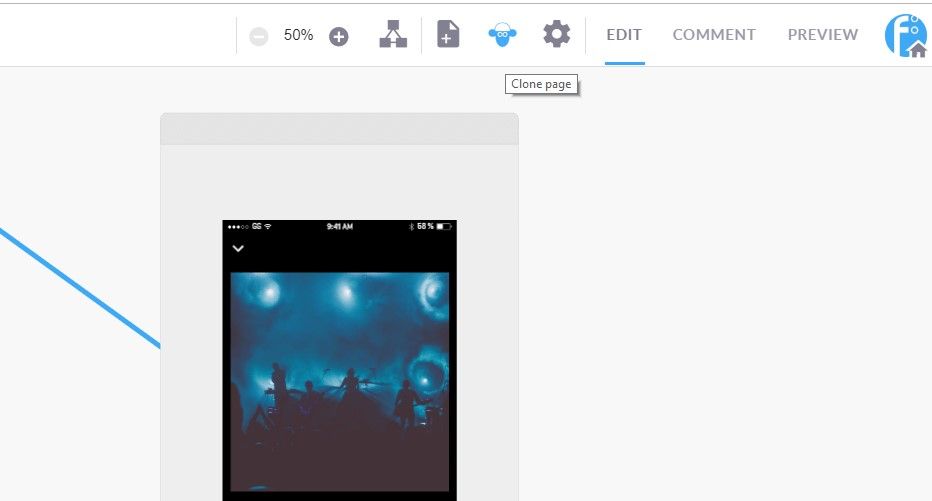
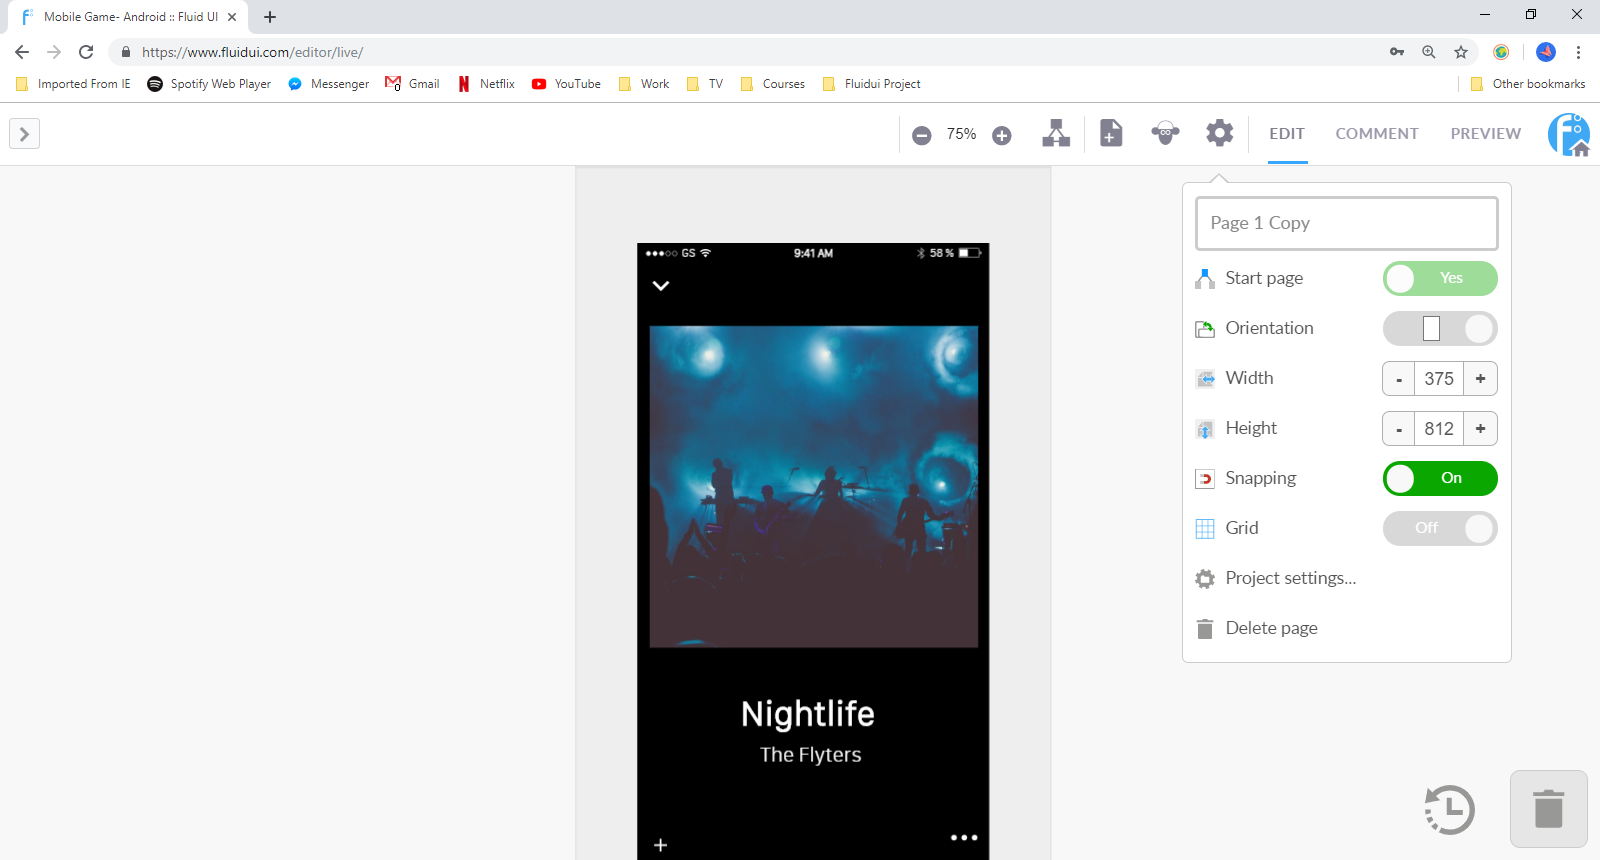
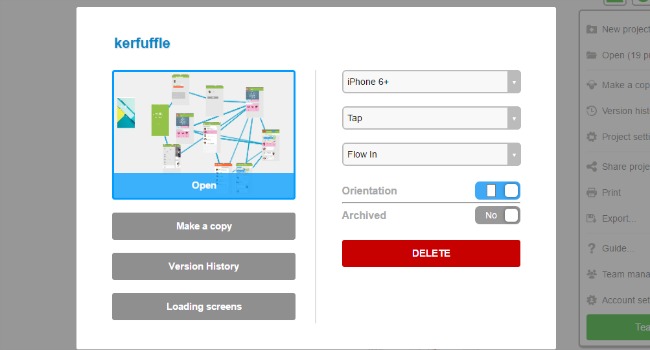
You can clone a page by clicking the sheep in the top bar.
You can delete a page by:
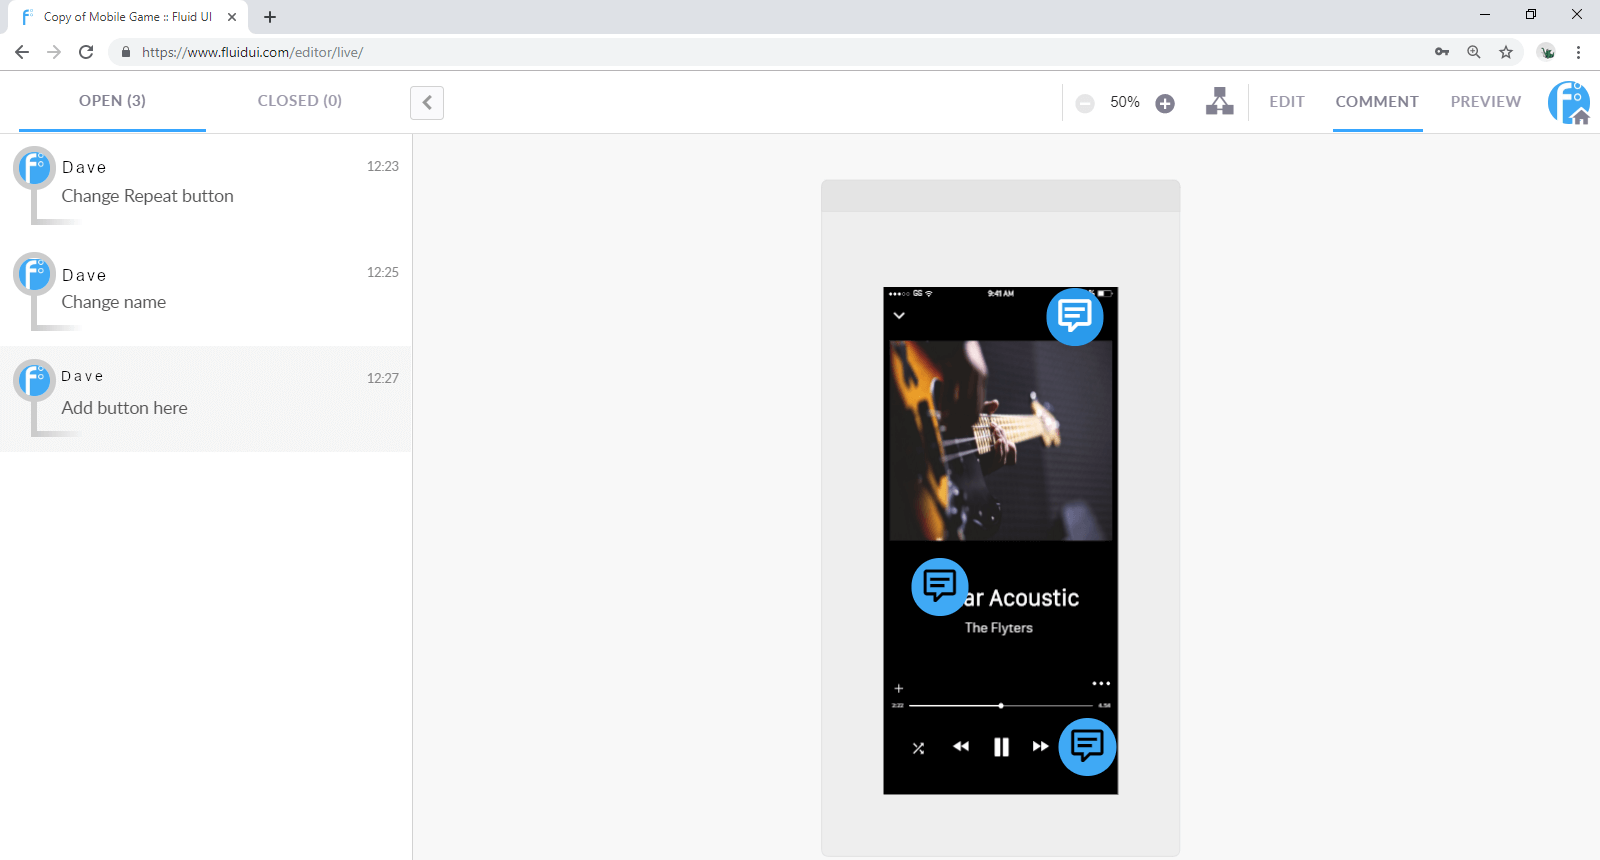
Click on the comment tab in the top bar. Here you can add your own comments and view comments made by collaborators.
To add a comment:
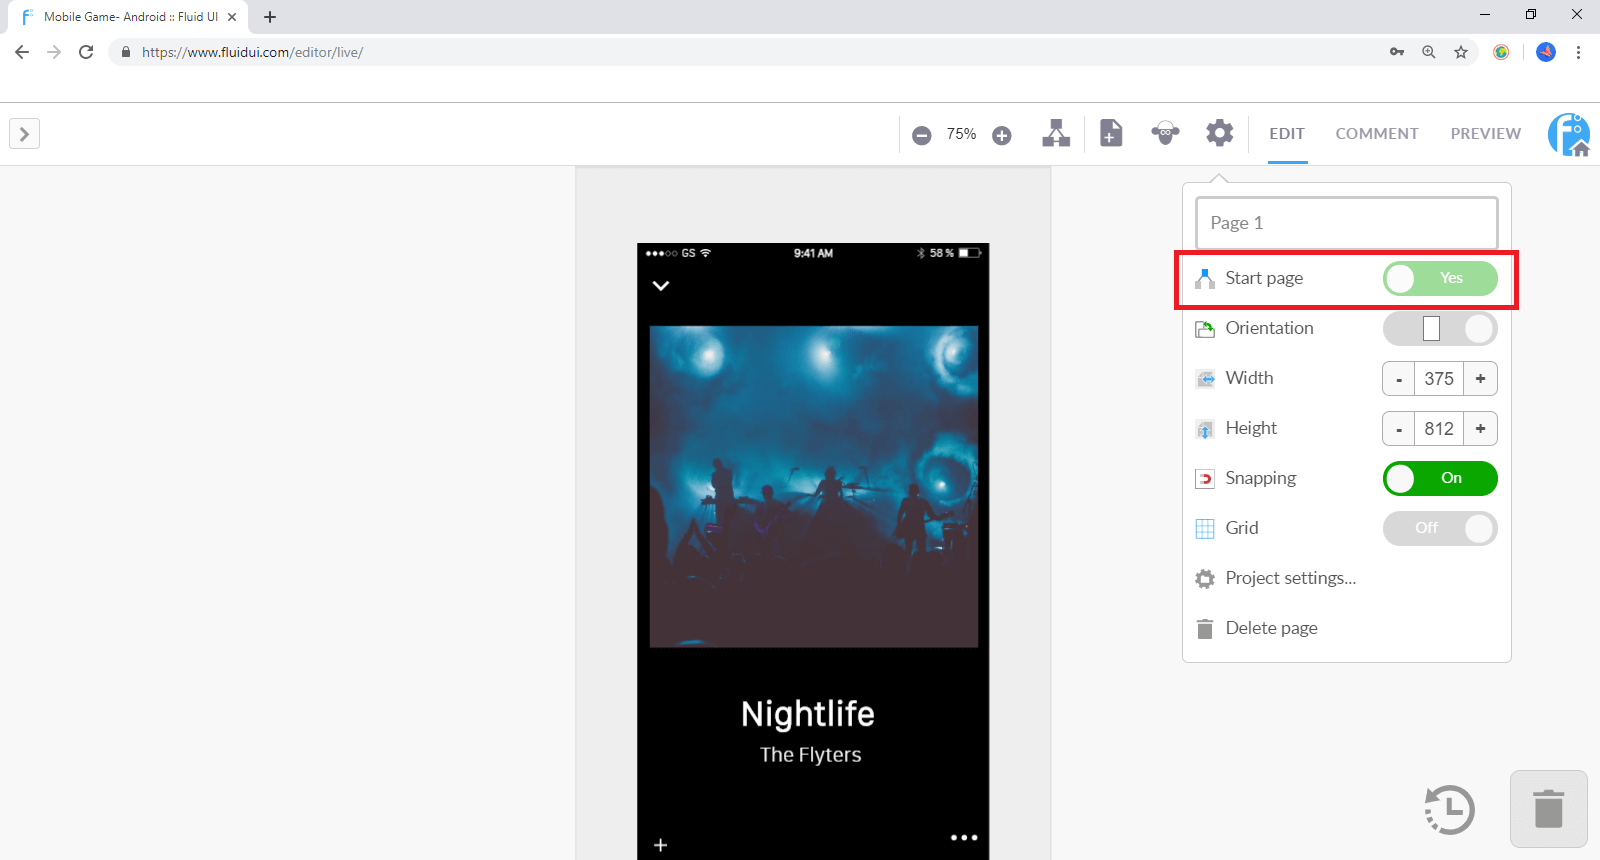
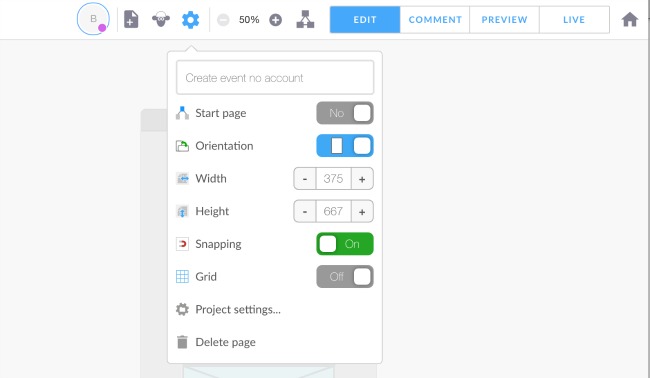
You can set any page in your prototype to the start page by focusing on that page and clicking the “Start page” switch in the page settings menu. Only one page can be the start page.
You can also click the preview button on any screen to preview starting with that particular page so you don’t need to navigate from the start page each time (this option is available once the page has widgets on it).
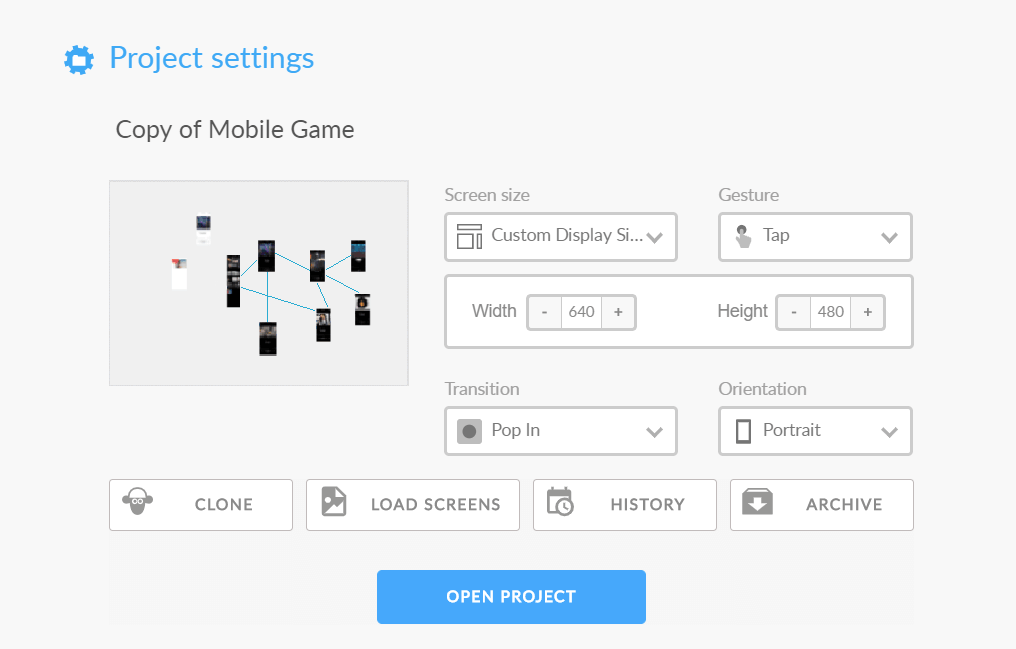
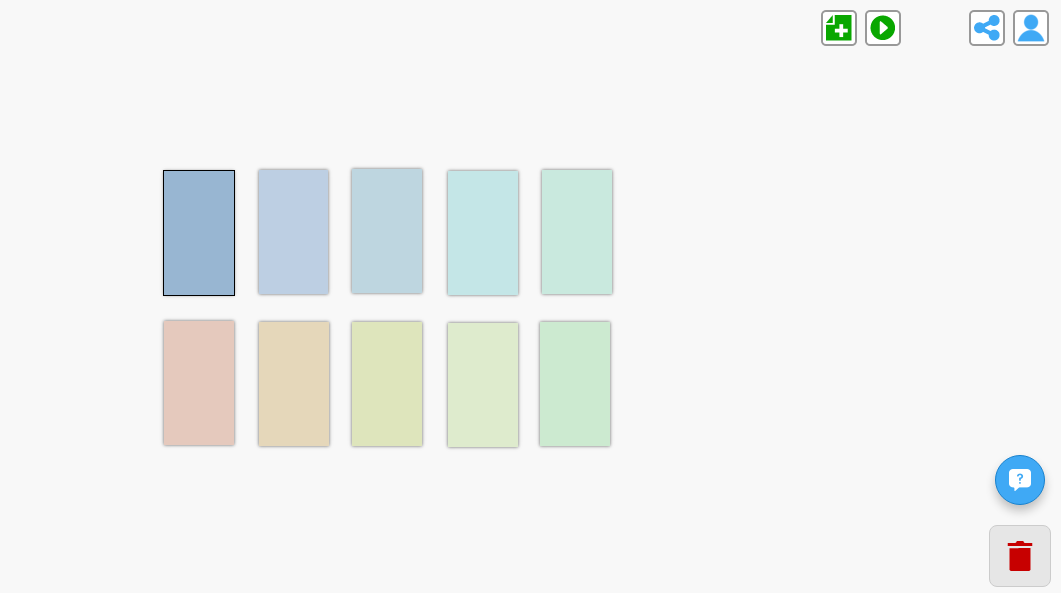
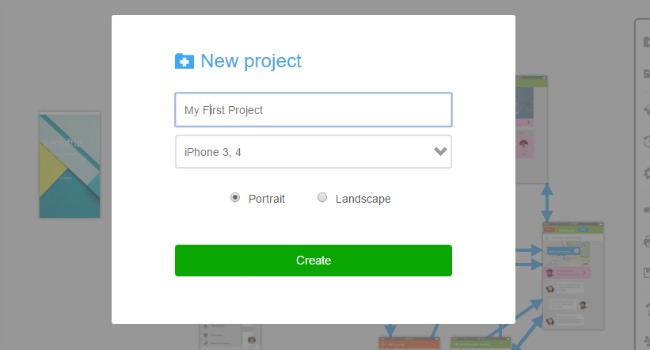
Choose your default screen orientation and resolution when you are creating a new project. You can also choose a custom size if your size is not in the presets.
Use project settings which is in the home menu to change the device orientation as well as the default gestures and transitions for your project.
Find out more about project settings
Increasing the page width or height in the page menu will automatically cause any pages to scroll (horizontally, vertically or both) when you preview.
Pinned widgets are frequently used with scrolling pages to make some content static while other content scrolls.
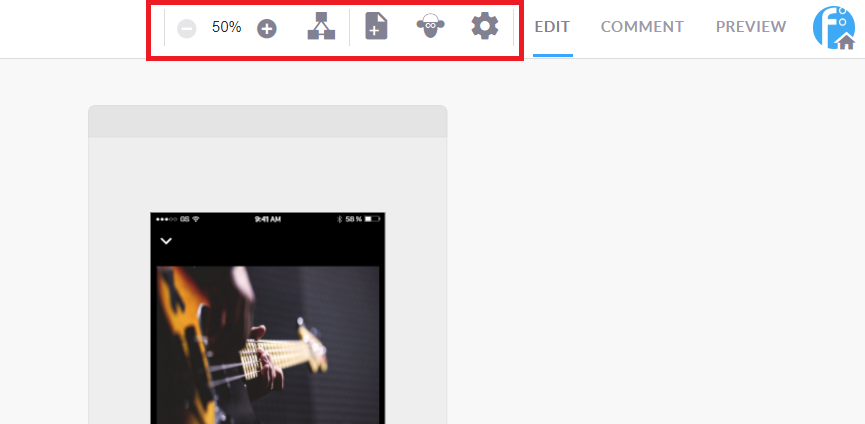
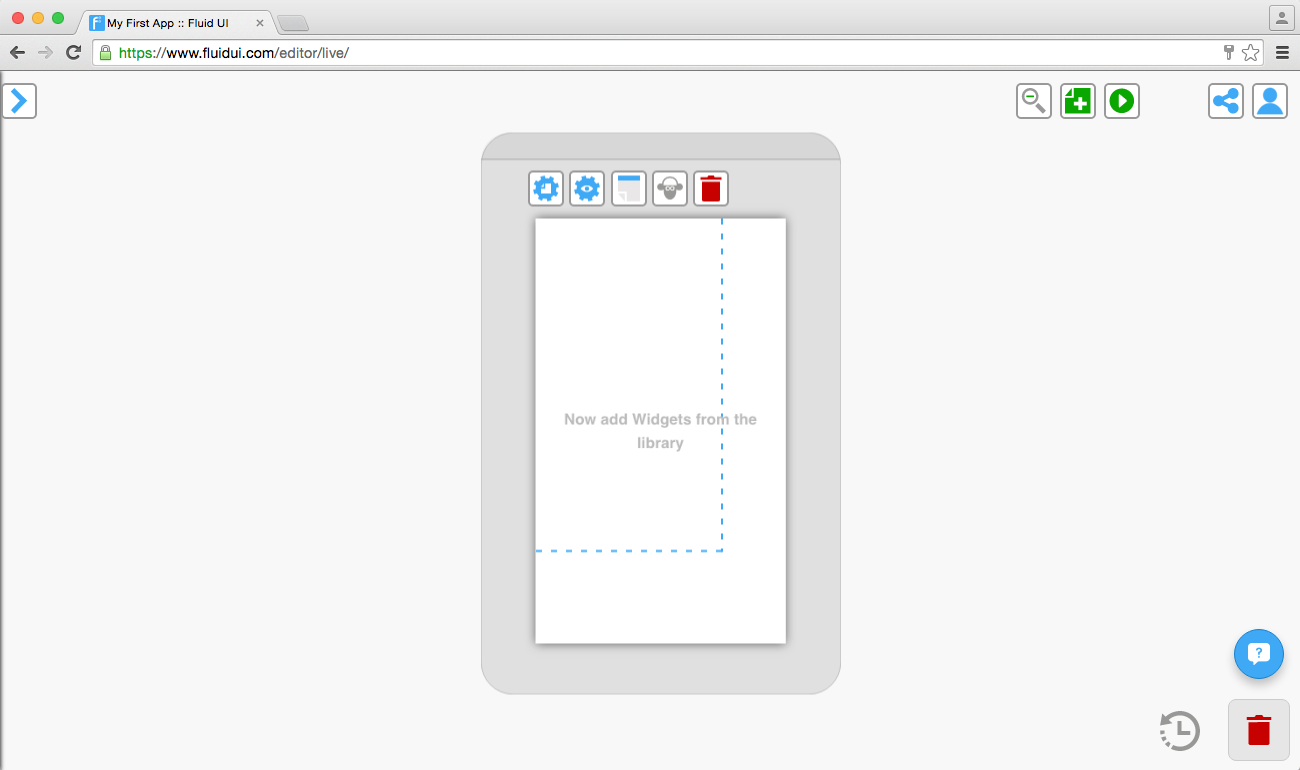
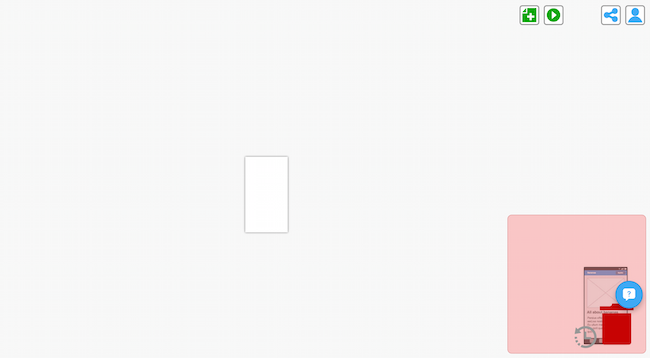
The top bar which is found at the top of the editor contains a number of features.
When we talk about screens in Fluid UI we are talking about the device screen you are designing for. You can read all about choosing the right screen resolution for your app design here.
You can choose which device screen resolution you are designing for when you create a new project and by choosing project settings in the home menu.
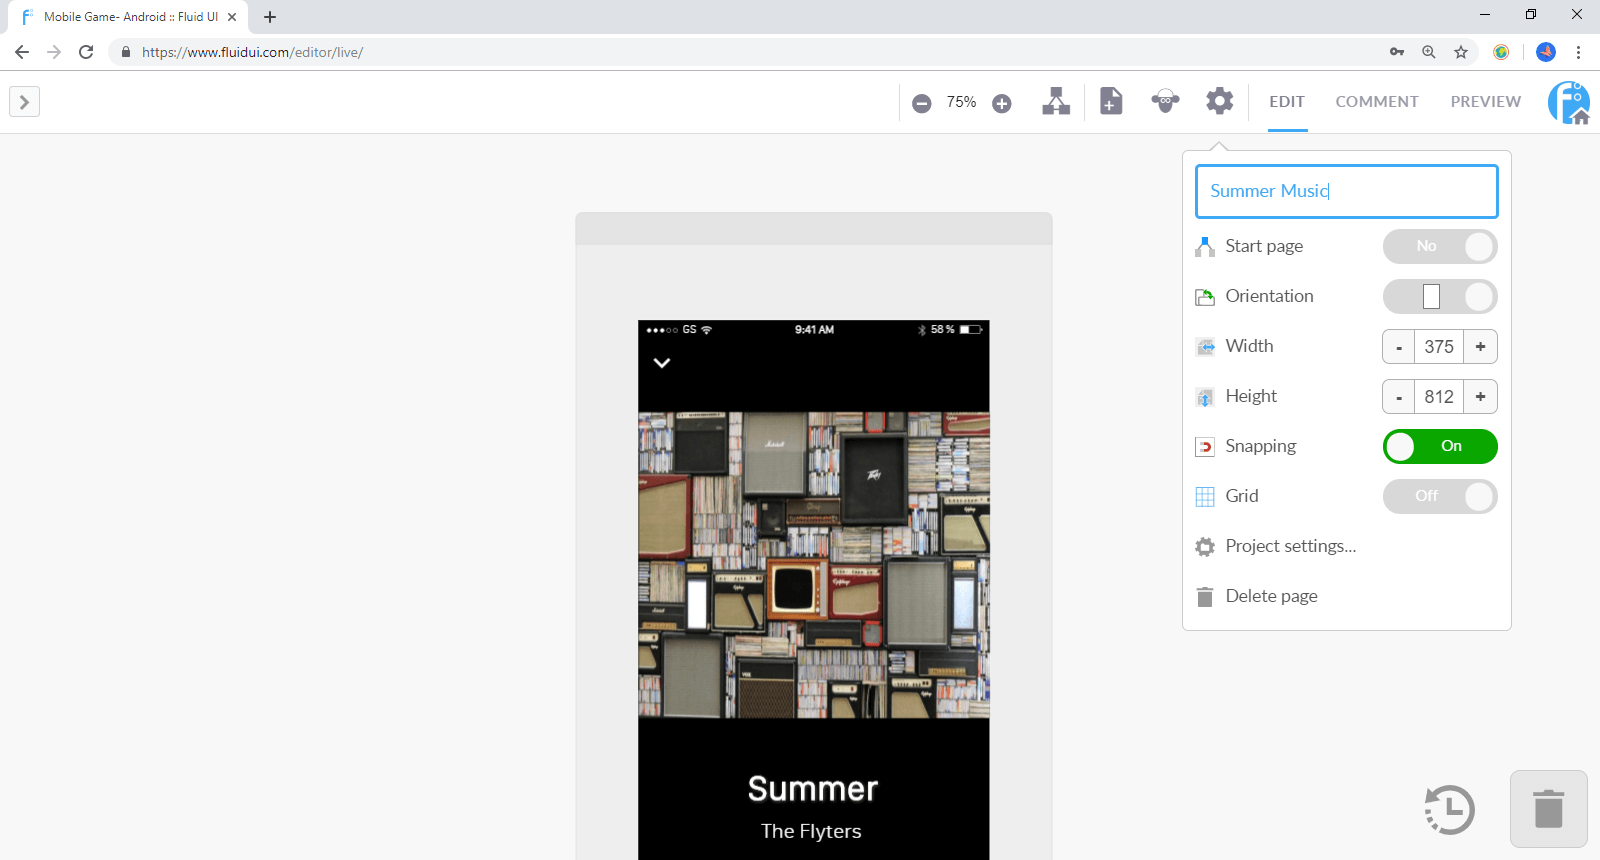
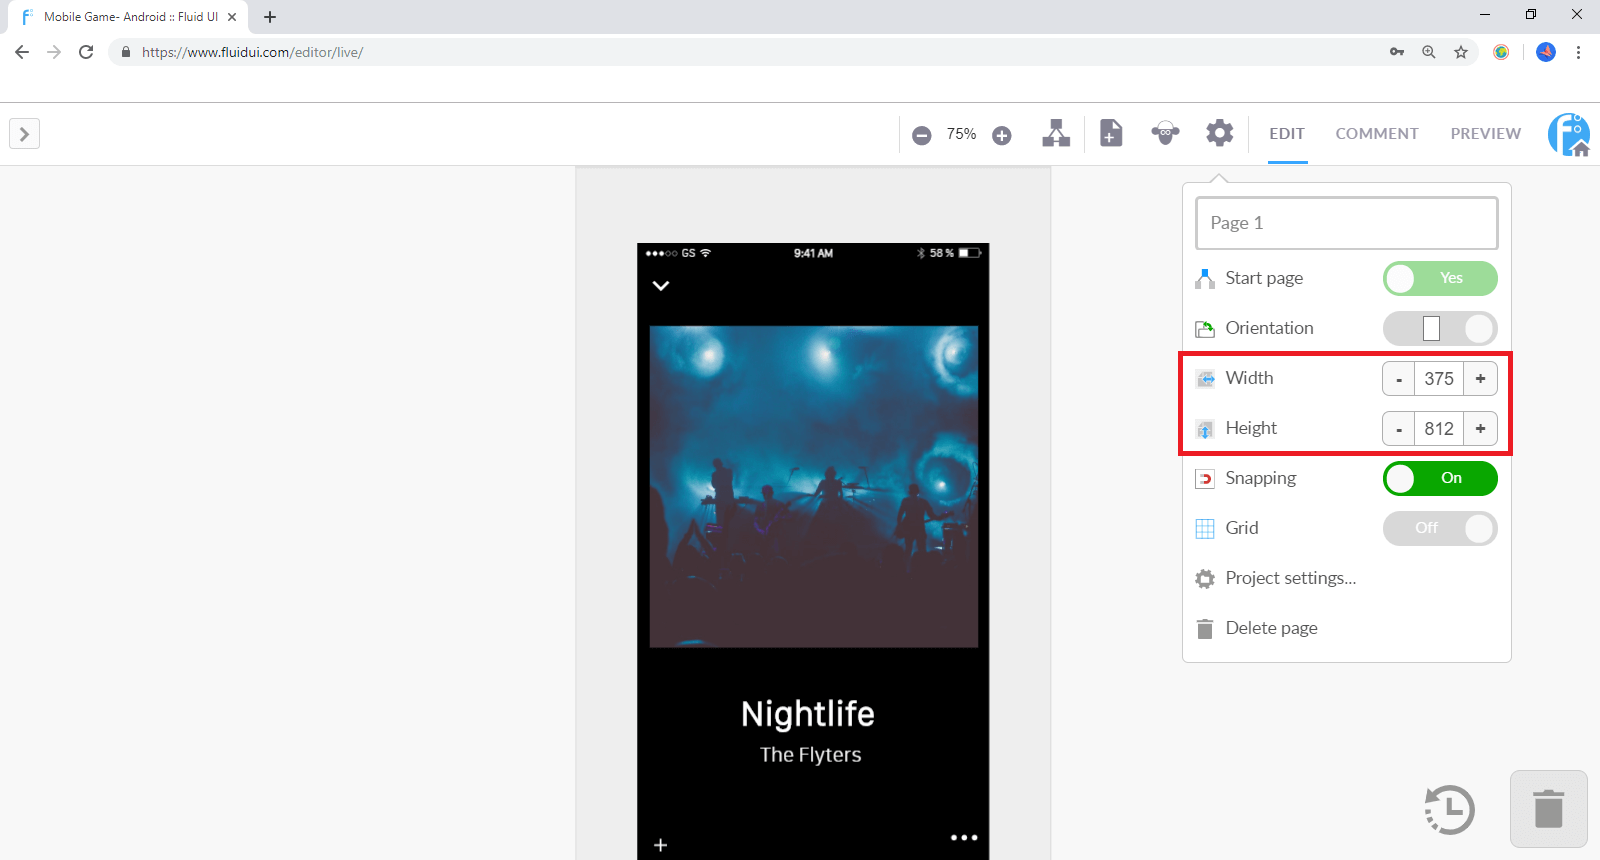
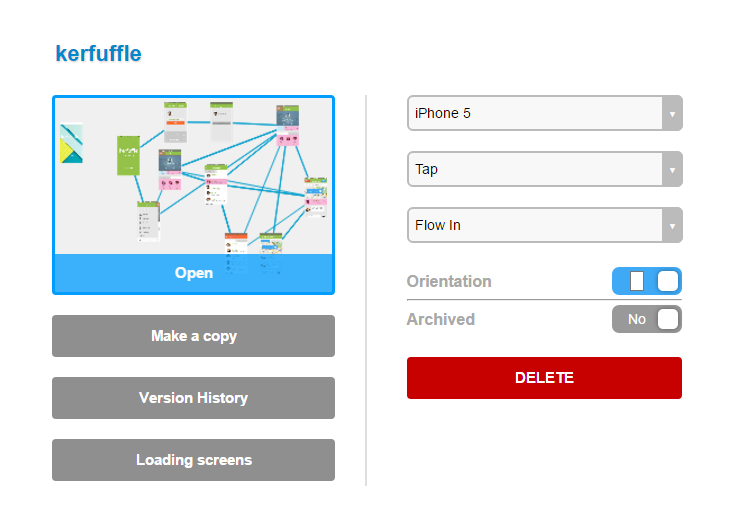
A page in your project corresponds to a page in the app you are designing. You can change the page’s height, width, orientation and set it as the starting page for when you’re previewing your app prototype.
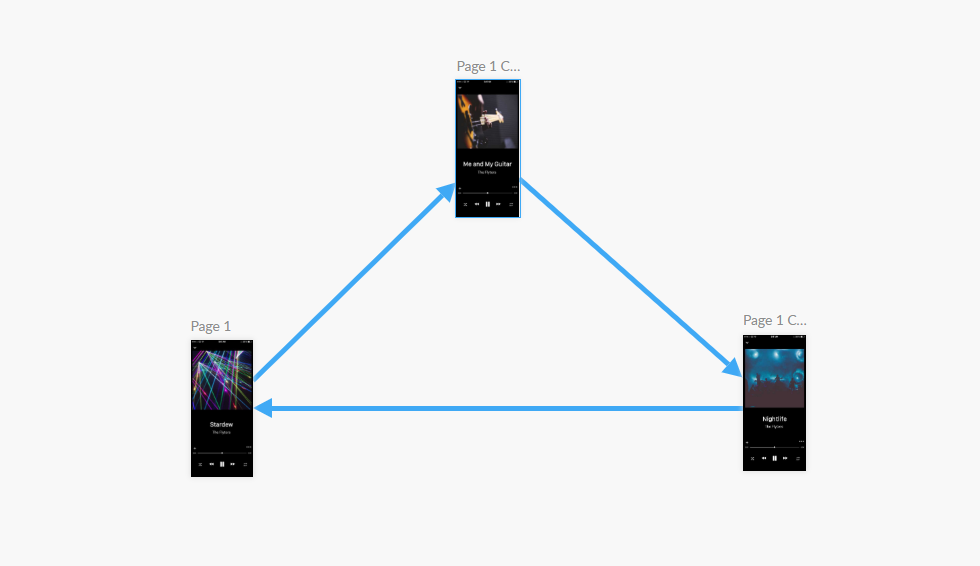
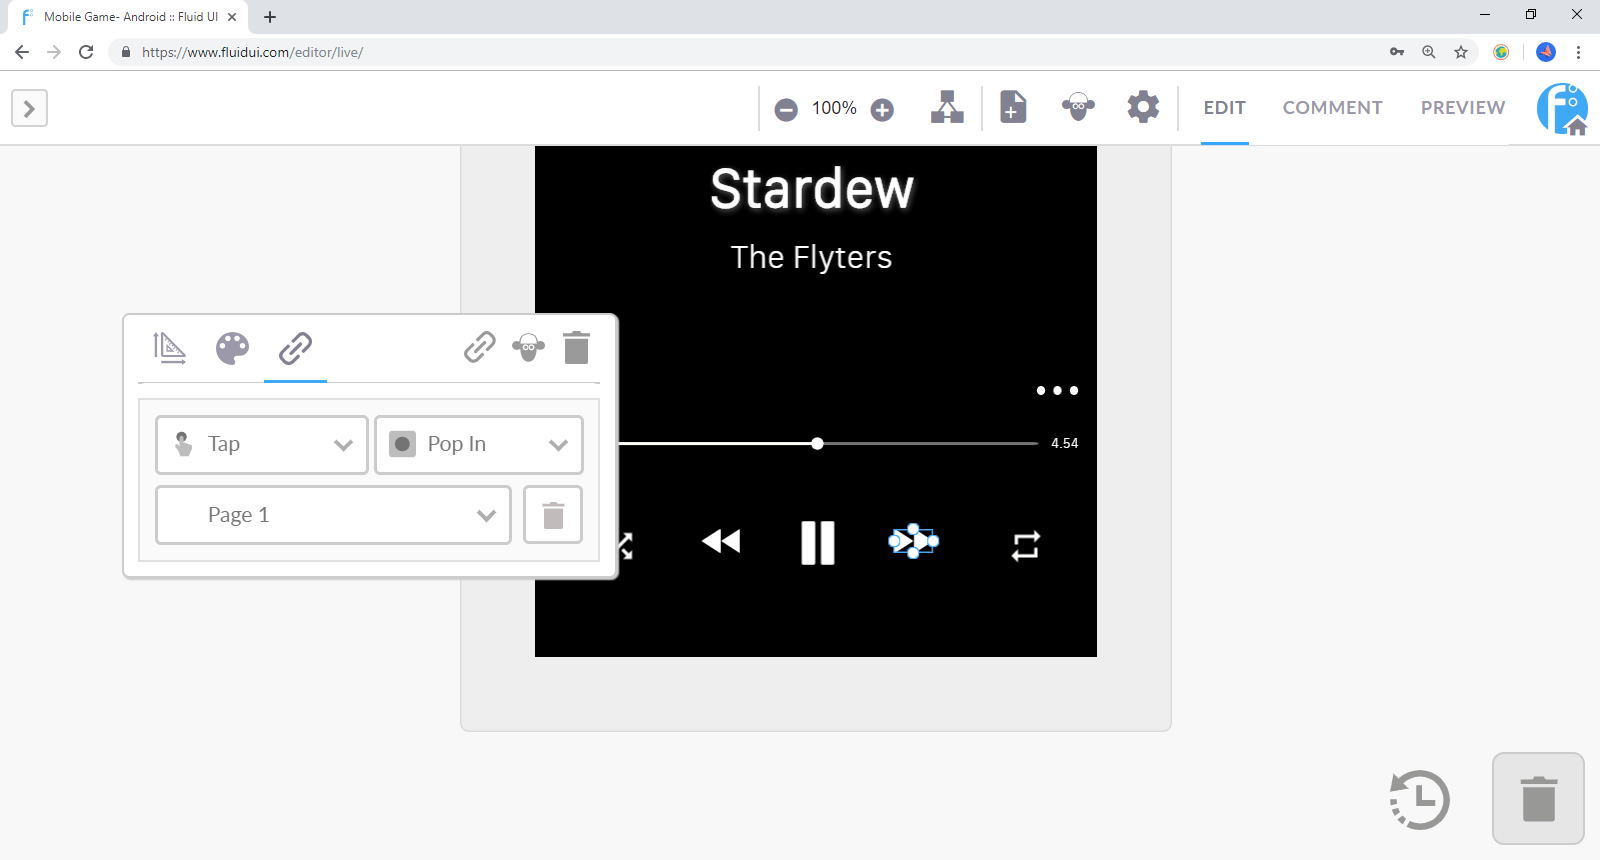
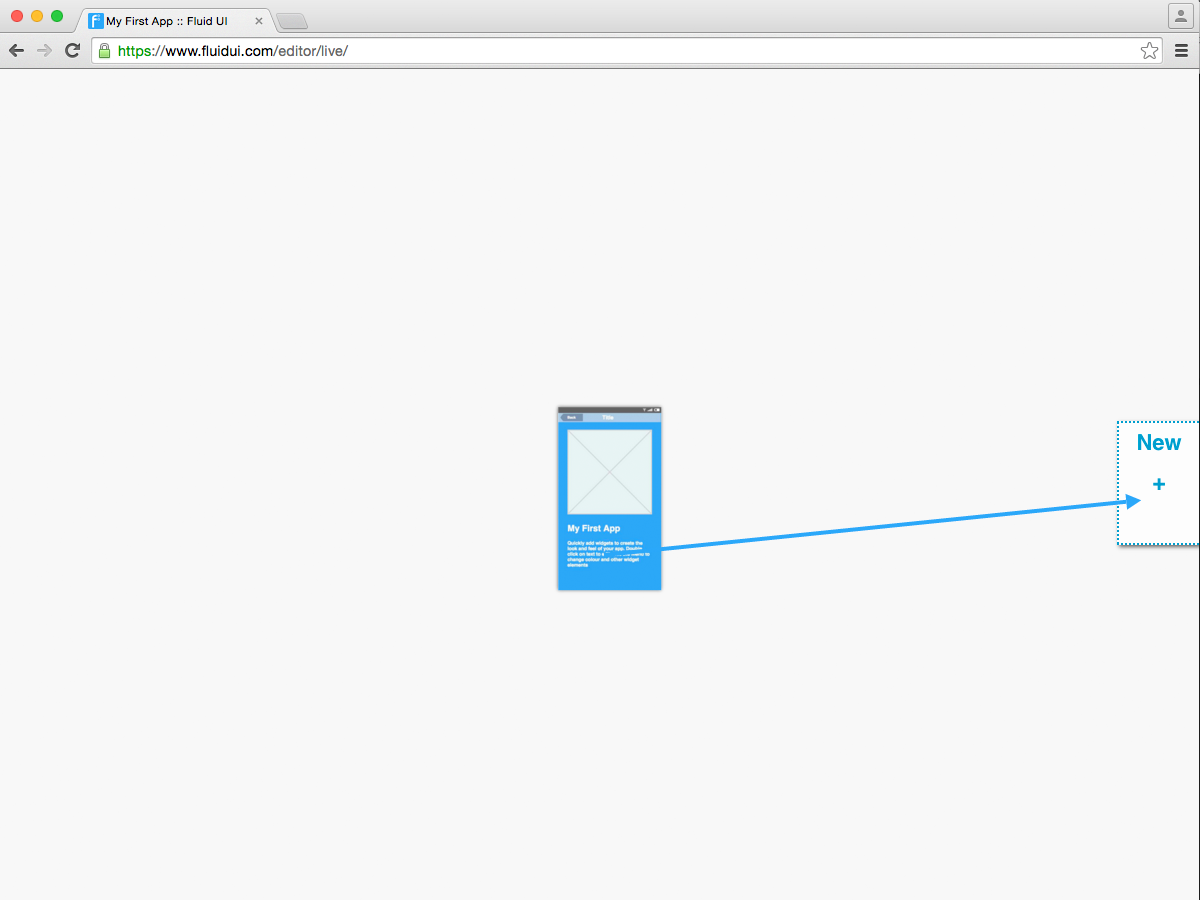
Select any widget or hotspot and use the blue ‘link’ icon on the right hand side of the widget menu. The screen will zoom out to your entire project. Click again to drop the link on the page you want to link to.
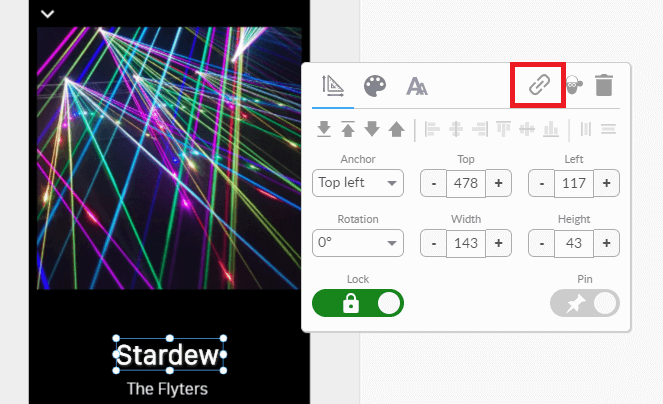
You can drop the link onto another page, or on the buttons that appear on the side of the canvas.
These include:
Once a link is created, you can click on the widget it is linked from and the link settings menu will appear in the tool bar. You can access the links gestures and transitions from here or alternatively, hover over a link and a circle with an arrow will pop up. If you click on this you will be given gesture and transition options as well.
Delete a link by clicking on the widget it is linked to. You’ll find a trash bin in the link settings which can be used to delete the link.
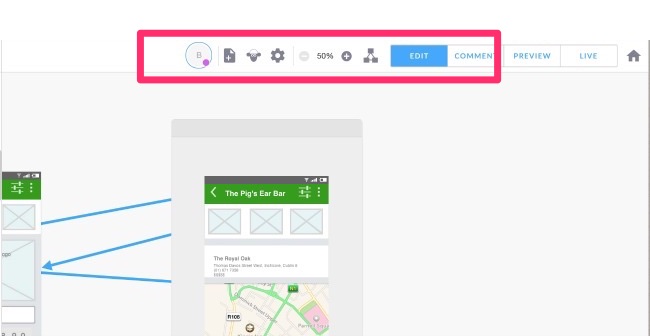
The top bar which is found at the top of the editor contains a number of features.
The page settings allows you to control all features related to the page you are working on.
When we talk about screens in Fluid UI we are talking about the device screen you are designing for. You can read all about choosing the right screen resolution for your app design here.
You can choose which device screen resolution you are designing for when you create a new project and by choosing project settings in the home menu.
A page in your project corresponds to a page in the app you are designing. You can change the page’s height, width, orientation and set it as the starting page for when you’re previewing your app prototype.
Next: Read about managing page settings in your projects.
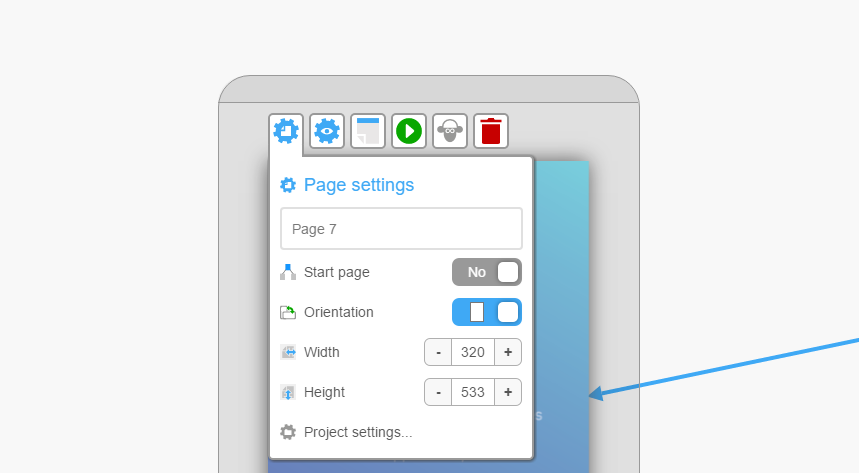
Chose a title for your page which will show up on the canvas in edit mode. You can change this title as many times as you like.
Choose the start page for your project, this will automatically start your app preview on this page.
Choose the page orientation, portrait or landscape.
Set the width and height of your page and make scrolling pages.
You can also access project settings from page settings.
Next find out about changing project settings.
Increasing the page width or height in the page menu will automatically cause any pages to scroll (horizontally, vertically or both) when you preview.
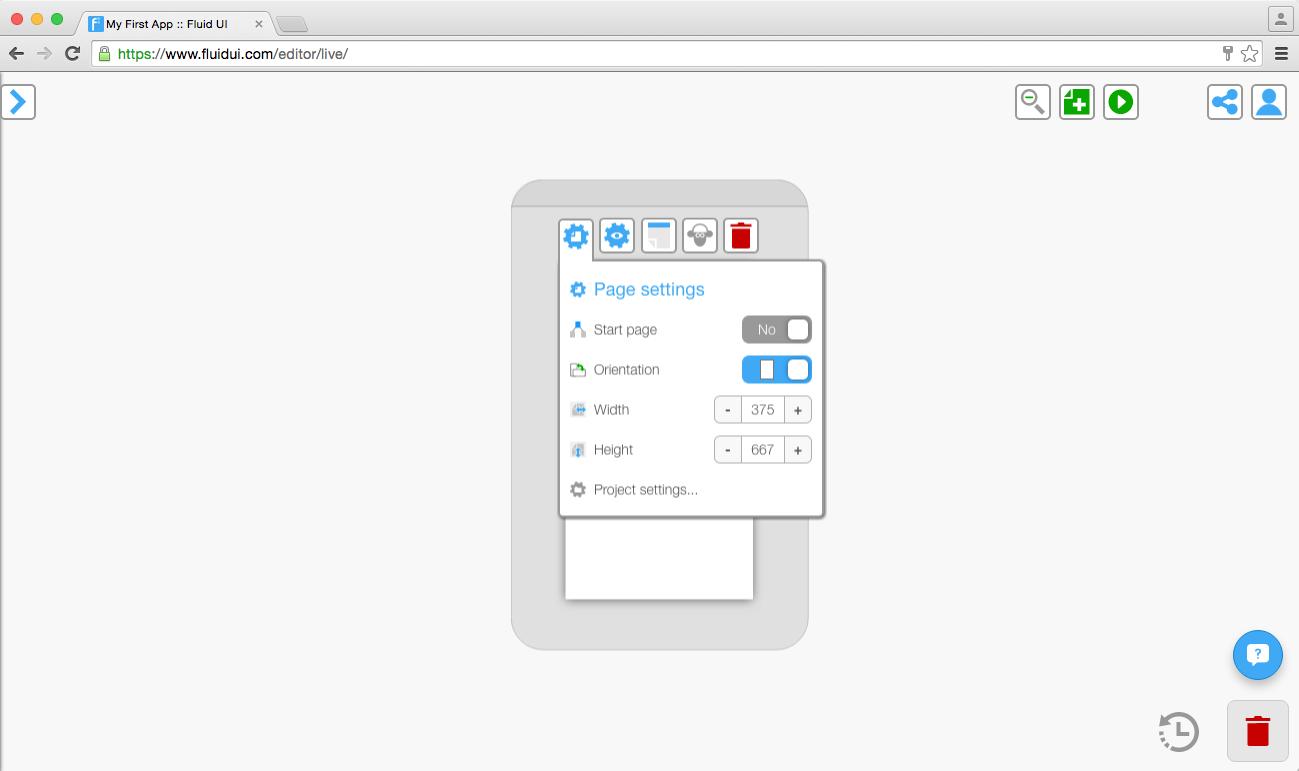
The dashed blue and white screen boundary marker will indicate where the page will start scrolling.
Pinned widgets are frequently used with scrolling pages to make some content static while other content scrolls.
You may also want to know more about changing your resolution/device type or the difference between the screen size and page sizes to set your project up to your liking.
Choose your default screen orientation and resolution when you are creating a new project. You can also choose a custom size if your size is not in the presets.
Use project settings which is in the home menu to change the device orientation as well as the default gestures and transitions for your project.
Next: Find out more about managing your project settings and managing your page settings.
You can set any page in your prototype to the start page by focusing on that page and clicking the “Start page” switch in the page settings menu. Only one page can be the start page.

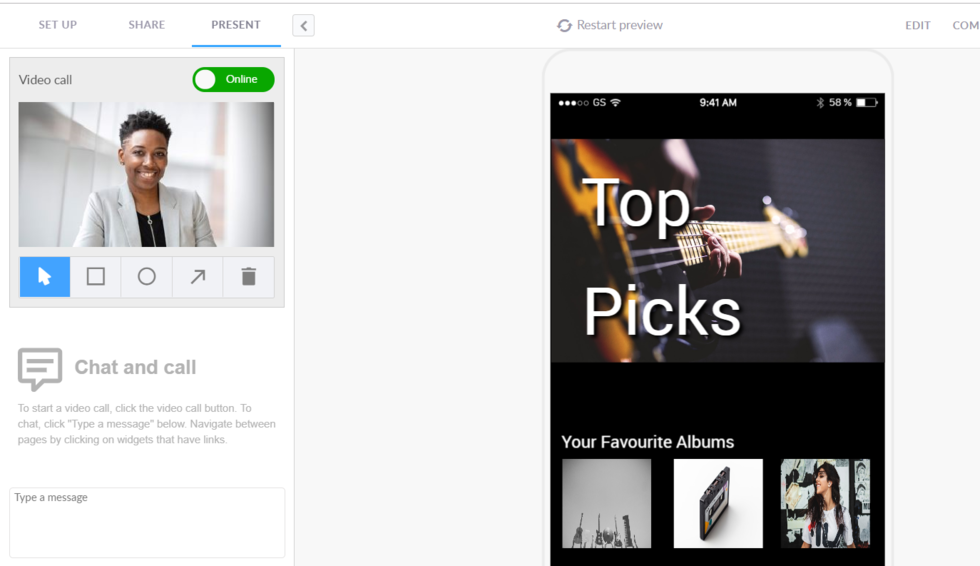
You can also the preview button on any screen to preview starting with that particular page so you don’t need to navigate from the start page each time (this option is available once the page has widgets on it).
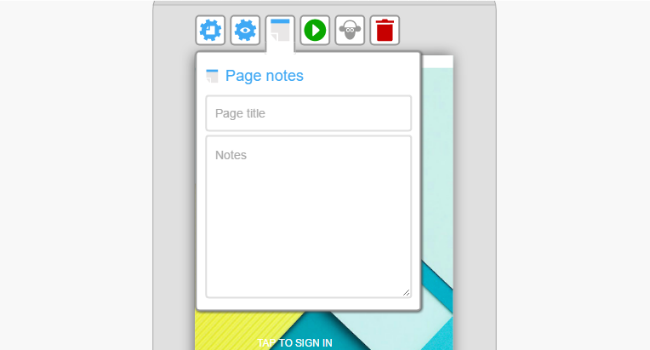
See more about the page settings, setting up the Fluid UI camera the way you want it or how to add page titles and page notes.

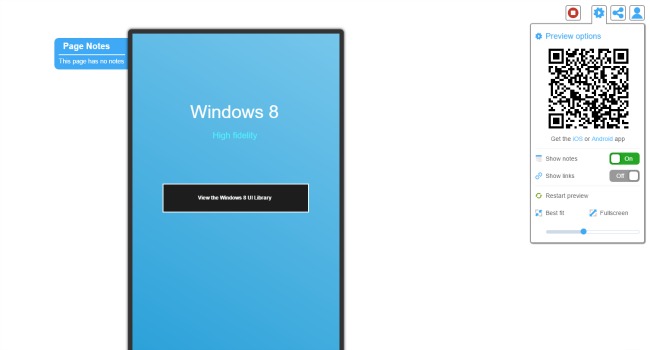
Next, have a look at the other preview settings and options.
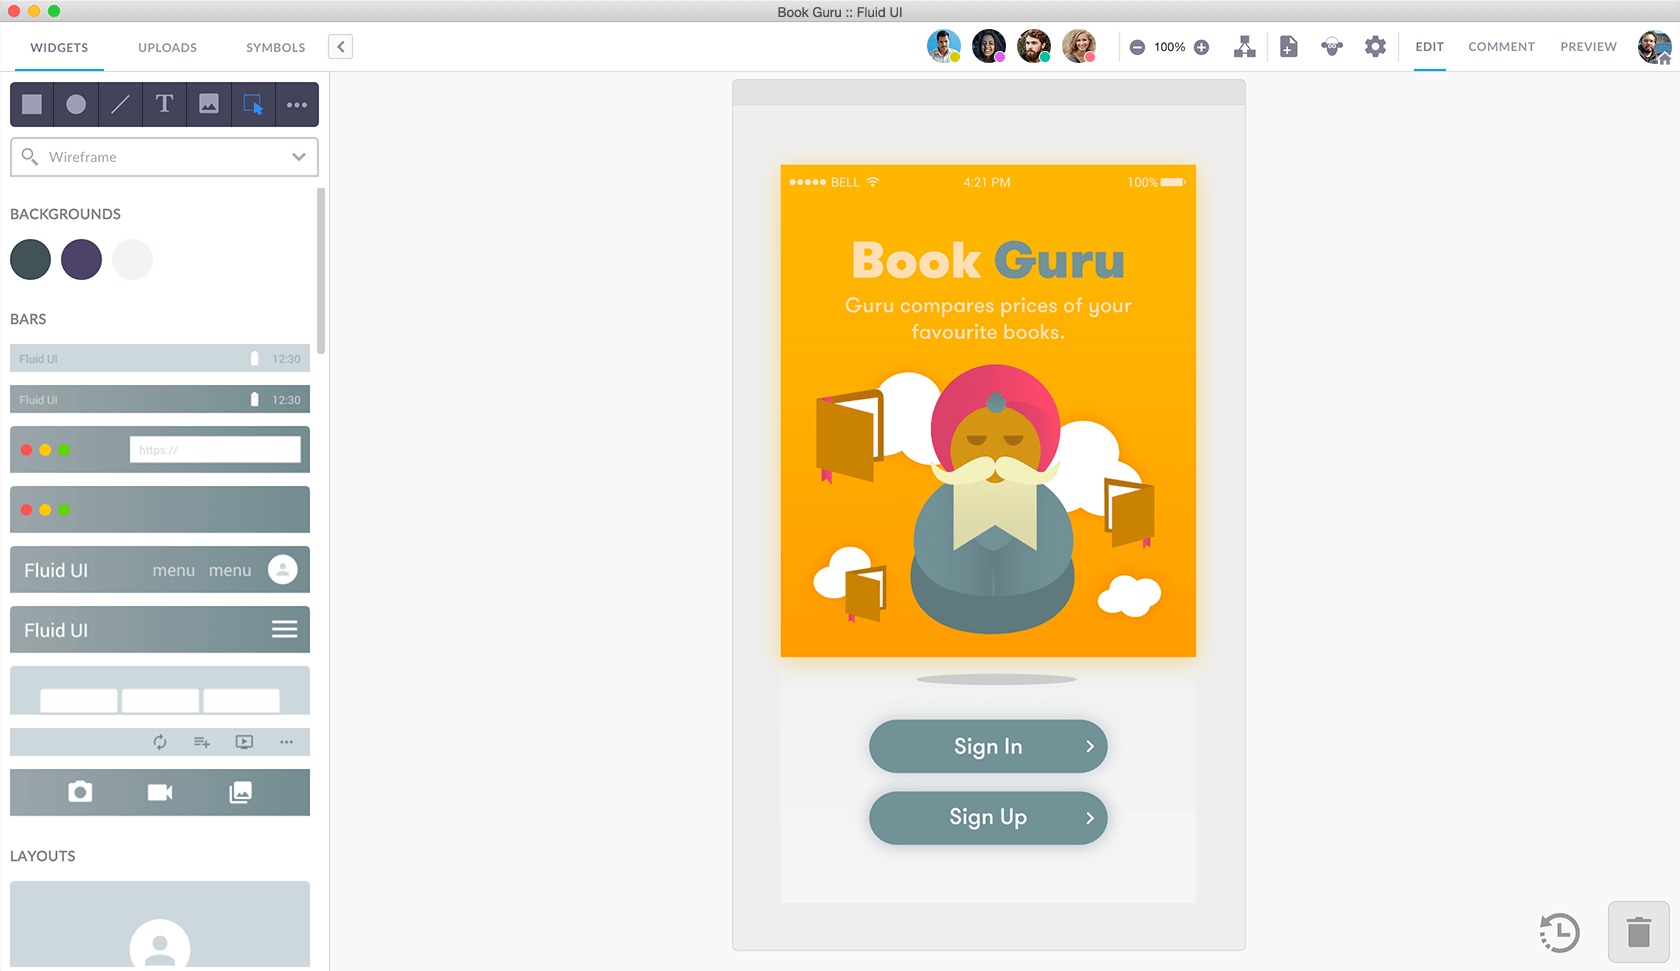
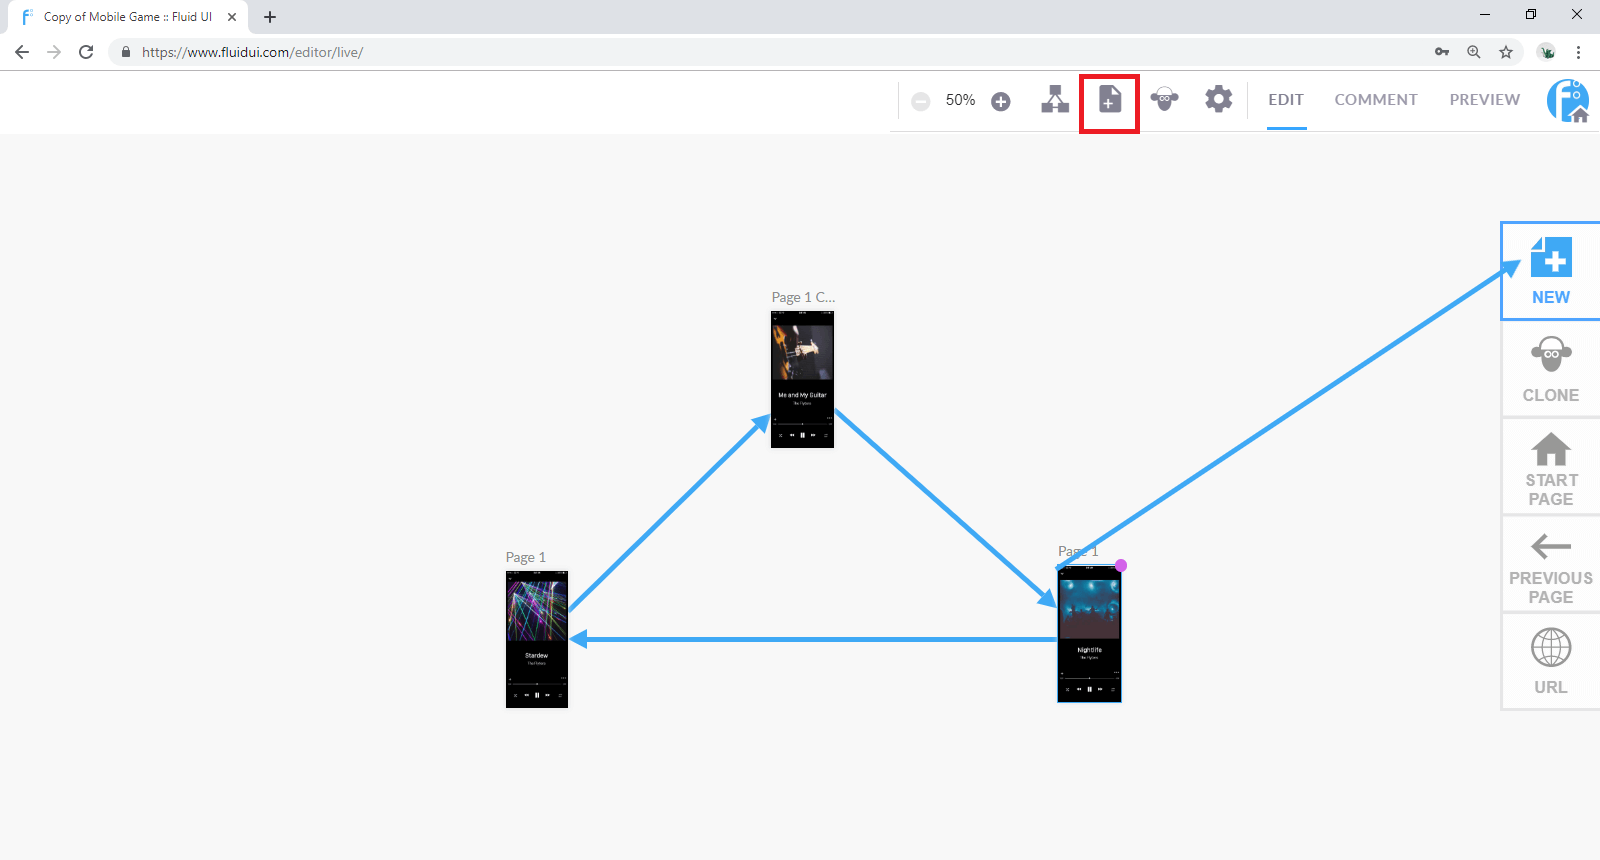
There are 3 ways to create a page with Fluid UI:
Double click anywhere on the canvas when zoomed out to create a page at that location.
Use the add page icon when zoomed out.
Create a link from one of your widgets and drop it on “New +”.
Once created, pages can be moved around the canvas to create a storyboard for your prototype.
Cloning pages
You can clone a page by clicking the sheep in the page menu.

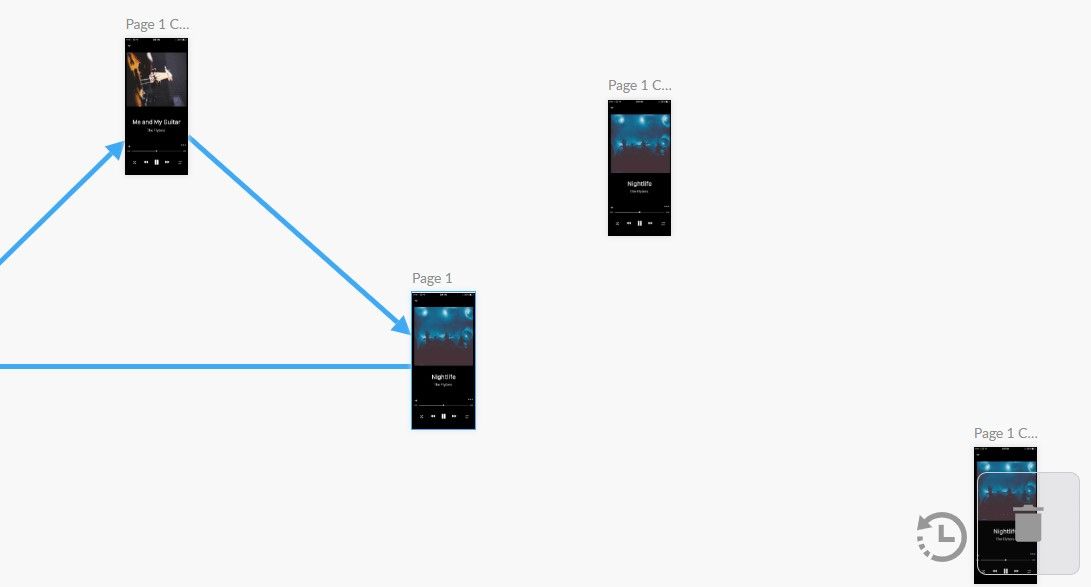
Deleting a page
You can delete a page by focusing on it and clicking delete in the page menu or by dragging it to the trash in project context.
Next, add widgets to your pages. People often also frequently ask how to set the start page and how to make pages scroll when previewing.