By default, Fluid UI tries to show your pages and widgets at 100% size. This reduces the amount of movement needed to edit your mockup and provides a better overall experience.
For screens that don’t fit in your browser window, Fluid UI provides two options to manage how you design your pages - Smart Zoom and Fixed Zoom. Each of them are useful in different contexts.
The options to change your camera settings are in the view settings which you’ll find in the page menu.
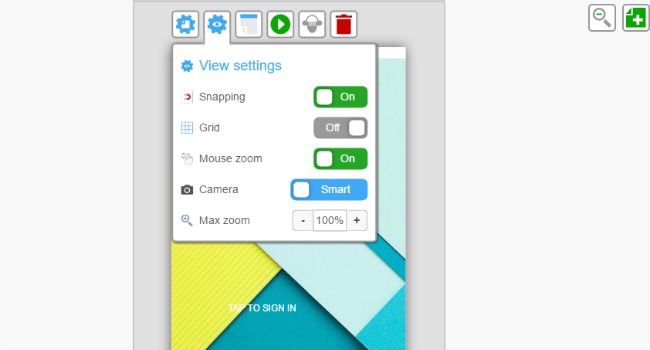
You can change the zoom on a page level by selecting view setting and adjusting it to your liking.
Tip: This mode is best when dealing with landscape pages on small monitors and when you frequently want to be able to view all the parts of a page in one go.
In fixed camera mode, clicking a page will automatically zoom you in fully to the widget scale without any intermediate zoom steps.
The page will center on the area you clicked, meaning you can quickly zoom in and out of big pages and target different parts of the screen you are working on.
Since you have already zoomed in to the widget zoom level, no additional zooming will be needed to work on widgets in that part of the screen.
Tip: This mode is best when you’re doing a lot of fine detailing work and want to skip quickly between project and widget zoom levels with less overall screen movement or when dealing with long screens full of content.
You can decide what scale to zoom in to when a widget is selected. The default is 100%. This can be set to any number especially for projects that require a finer level detail.
Setting the zoom scale gives you fine grain control over how far you want to zoom in to individual widgets.
Large widgets can sometimes be difficult to view completely on a small monitor. Set the zoom scale to 50% or 75% to be able to view those widgets.
If you are using mouse wheel zoom and zooming is happening too often, try turning down the sensitivity for scroll actions in your computer’s settings or turning off mouse scrolling in the view settings.
Different options become available at each context. Learn how to navigate the canvas to make your workflow even more efficient.
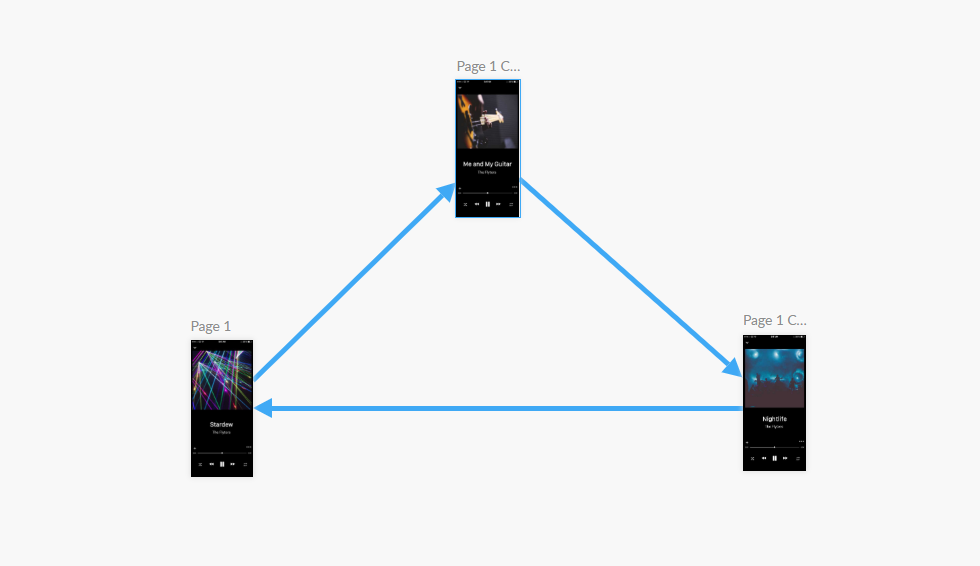
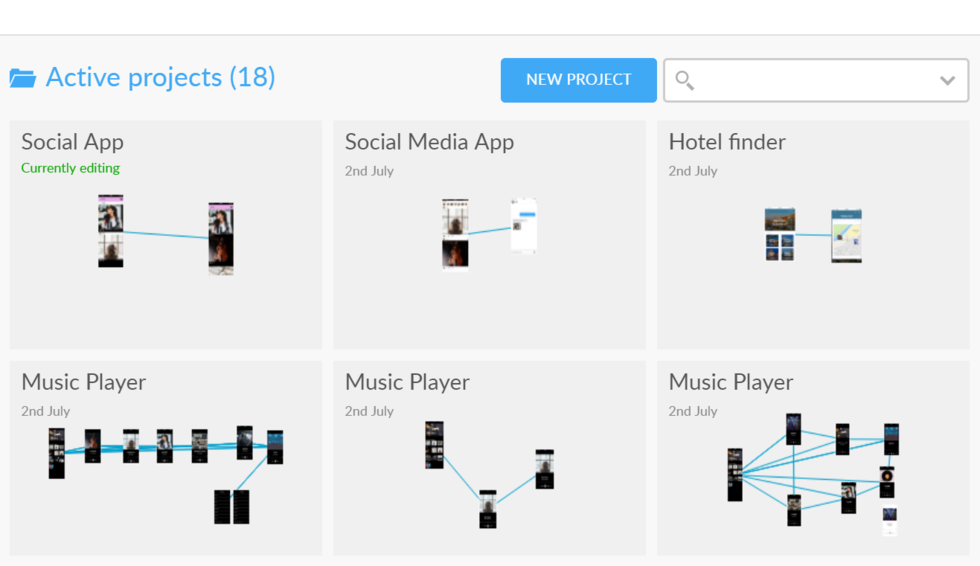
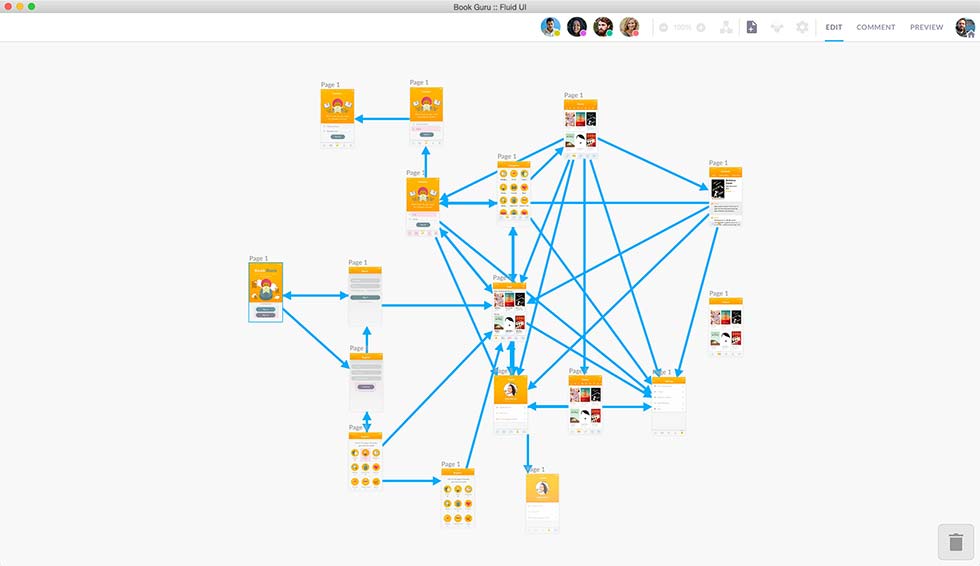
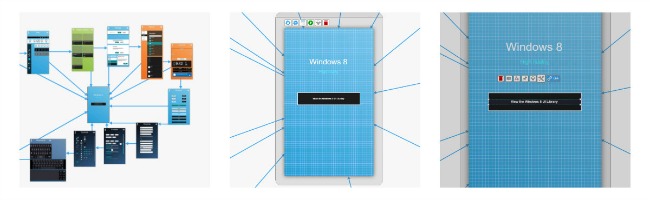
The project will be zoomed out to the maximum and all the pages and links in your project will be visible. You can use this mode to move pages around your project and get an overview of your entire project.
How to zoom to project context
Actions in project context
The page will be centered and the page menu will be visible. Here, you can manage the width and height of your pages, make page notes, set the start page, orientation and more.
How to zoom into a page
Navigating between pages
Zoom out to the project level and click a new page to focus on that page.
Click a non active page at page level to focus on that page.
Click any link to follow that link to its destination page.
Use the arrow keys to navigate backwards and forwards between pages in preview mode.
Tip: If you focus on a non active page that is already on screen, the canvas won’t move. This helps when editing multiple pages that are lined up closely.
Actions at page context
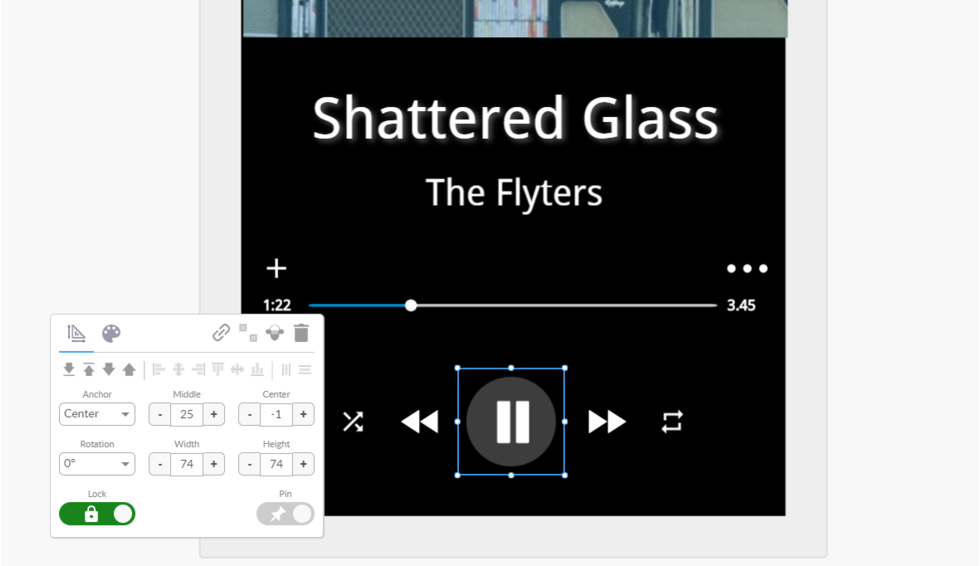
The widget menu will be visible and a widget or widgets will be selected. Use this level to change the look, feel, positioning and size of each widget.